Follow this tutorial and you will be able to play games like Minecraft with the Sixaxis Controller.
Posts mit dem Label english werden angezeigt. Alle Posts anzeigen
Posts mit dem Label english werden angezeigt. Alle Posts anzeigen
Freitag, 22. Juli 2011
How to set up a Sixaxis Controller with QJoypad in Ubuntu
 |
| Dualshock 3 Controller with a mini-USB-cable |
We are going to connect the Controller via USB, so you make sure your Sixaxis Controller is plugged in with a mini-USB-cable.
First of all we install the
joystick Package viasudo apt-get install joystickcat /dev/input/js0 |
| Qt's logo |
sudo apt-get install libqt4-core libqt4-dev qt4-dev-tools qt4-designer qt4-docsudo apt-get install libxtst6 libxtst-devNow comes the more complicated part: Download QJoyPad. Open up a Terminal an execute the following commands in order to extract the source.
cd ~/Downloads
tar xzf qjoypad-4.1.0.tar.gzcd cd qjoypad-4.1.0/src/
./config
make
sudo make installQJoyPad will start minimized in the system tray, but Natty doesn't allow every application to show up in the system tray. We will change these settings; execute:
gsettings set com.canonical.Unity.Panel systray-whitelist "['all']"qjoypad. Now you can take input from the controller translate it into key strokes or mouse actions. The UI should be self explanatory ;)

Samstag, 25. Juni 2011
Hard Disk backup / mirroring with Ubuntu and dd
In this post I will show you how to mirror your hard disk with Ubuntu and the dd command. I used this method to backup the data from my laptop, which didn't start anymore. I was sure the hard disk was still alive and i wanted to save all my data.
At first you've got to make sure both hard disks are connected to the PC.
In my case /dev/sdc is the source and /dev/sdd is the target hard disk.
Use this command to mirror the whole hard disk, bit per bit.
The dd command copies the hard disk bit per bit and the pv command adds a neat progress bar, because by default dd comes with no visual feedback.

For me it took like 3 hours to mirror all the data to my new USB-hard-disk.
 |
| You will need a s-ATA to USB cable like this one |
In my case /dev/sdc is the source and /dev/sdd is the target hard disk.
Use this command to mirror the whole hard disk, bit per bit.
pv /dev/sdc | dd bs=128k of=/dev/sddThe dd command copies the hard disk bit per bit and the pv command adds a neat progress bar, because by default dd comes with no visual feedback.
For me it took like 3 hours to mirror all the data to my new USB-hard-disk.
Mittwoch, 22. Juni 2011
Dienstag, 31. Mai 2011
How to play Minecraft with a Wiimote
How to set up Bluetooth correctly
Edit the file /etc/cwiid/wminput/minecraft eg. with
sudo gedit /etc/cwiid/wminput/minecraft and copy and paste the code below. You could also save this file as /etc/cwiid/wminput/minecraft Now start wminput:
sudo wminput -c minecraft -w Pointing does not work but I'm figuring it out ;)
I think the key assignment is self-explanatory.
#Head Movement
Plugin.acc.X = REL_X
Plugin.acc.Y = REL_Y
#Body Movement
Plugin.nunchuk_stick2btn.Up = KEY_W
Plugin.nunchuk_stick2btn.Down = KEY_S
Plugin.nunchuk_stick2btn.Left = KEY_A
Plugin.nunchuk_stick2btn.Right = KEY_D
#Left Mouse Button, Right Mouse Button and Space
Wiimote.B = BTN_LEFT
Nunchuk.Z = BTN_RIGHT
Wiimote.A = KEY_SPACE
Wiimote.Home = KEY_E
Wiimote.2 = KEY_ESC
Sonntag, 29. Mai 2011
A fast and easy way to install the Minecraft server in Ubuntu Linux
All you've got to do in order to install the minecraft server is follow these instructions.
Or you can use a shell script i wrote:
I know the code is pretty messy, but it's the first shell script i've written so I'm OK with it ;)
Or you can use a shell script i wrote:
- download
- make it executable (
chmod a+x minecraft_server_setup.sh) - execute it(
./minecraft_server_setup.sh)
#!/bin/bash
echo -n 'Do you want to (i)nstall or (s)tart the minecraft server?'
read watdo
startit(){
 if [ -d ~/.minecraft\ server/ ]; then
  cd ~/.minecraft\ server/
  echo -n "Do you have more than 1024MB of RAM?
  (y)es or (n)o"
  read watram
  echo -n "Do you want to start the server with a GUI?
   (y)es or (n)o"
  read watgui
  case "$watram" in
   y|Y|Yes)
    case "$watgui" in
     y|Y|Yes)
      java -jar minecraft_server.jar
     ;;
     n|N|no|No)
      java -jar minecraft_server.jar nogui
     ;;
     *) echo "Unknown Parameter"
     read ''
     ;;
    esac
   ;;
   n|N|no|No)
    case "$watgui" in
     y|Y|Yes)
      java -Xmx1024M -Xms1024M -jar minecraft_server.jar
     ;;
     n|N|no|No)
      java -Xmx1024M -Xms1024M -jar minecraft_server.jar nogui
     ;;
     *) echo "Unknown Parameter"
     read ''
     ;;
    esac
   ;;
   *) echo "Unknown Parameter"
   read ''
   ;;
  esac
 else
  echo "You don't seem to have the Minecraft server installed.
Do you want to install it now?
(y)es or (n)o"
  read watdo
  installit
 fi

}
installit(){
 case "$watdo" in
 y|Y|yes|Yes|i|I|install|Install)
 if [ ! -d ~/.minecraft\ server/ ]; then
  mkdir ~/.minecraft\ server
  cd ~/.minecraft\ server/
  wget http://www.minecraft.net/download/minecraft_server.jar
  chmod a+x minecraft_server.jar
  echo -n "Do you want to start the server now?
   (y)es or (n)o"
  read startnow
  case "$startnow" in
  y|Y|Yes)
   startit
  ;;
  *)
  ;;
  esac
 else
  echo "The Minecraft Server seems to be installed.
Do you want to start it now?
(y)es or (n)o"
  read watnowdo
  case "$watnowdo" in
  y|Y|yes|Yes)
   startit
  ;;
  *)
  ;;
  esac
 fi
 ;;
 s|S|start|Start)
  startit
 ;;
 n|N|no|No)
  exit 0
 ;;
 *)
  echo "Unknown Parameter"
  read ''
 ;;
esac
}
installit
exit 0
I know the code is pretty messy, but it's the first shell script i've written so I'm OK with it ;)
Donnerstag, 26. Mai 2011
How to turn off the log in sound in Ubuntu
If you are like me, and often switch between different OS, you will get annoyed by login sounds easily. I tried to turn the Ubuntu login sound off, but the option to do so is somewhat hidden.
The Ubuntu login sound.
The settings in gdmsetup, didnt change anything
In order to turn off the login sounds you have to start gnome-session-properties:
In the gnome-session-properties search for "GNOME Login Sound" and remove the check mark
When you log in the next time, no login sound will be played :)
Here you can compare the Windows 7 login sound to the Ubuntu one
What do you think, which one sounds better?
And if you have a custom login sound for Windows or Ubuntu, leave a comment and let us know!
The Ubuntu login sound.
The settings in gdmsetup, didnt change anything
 |
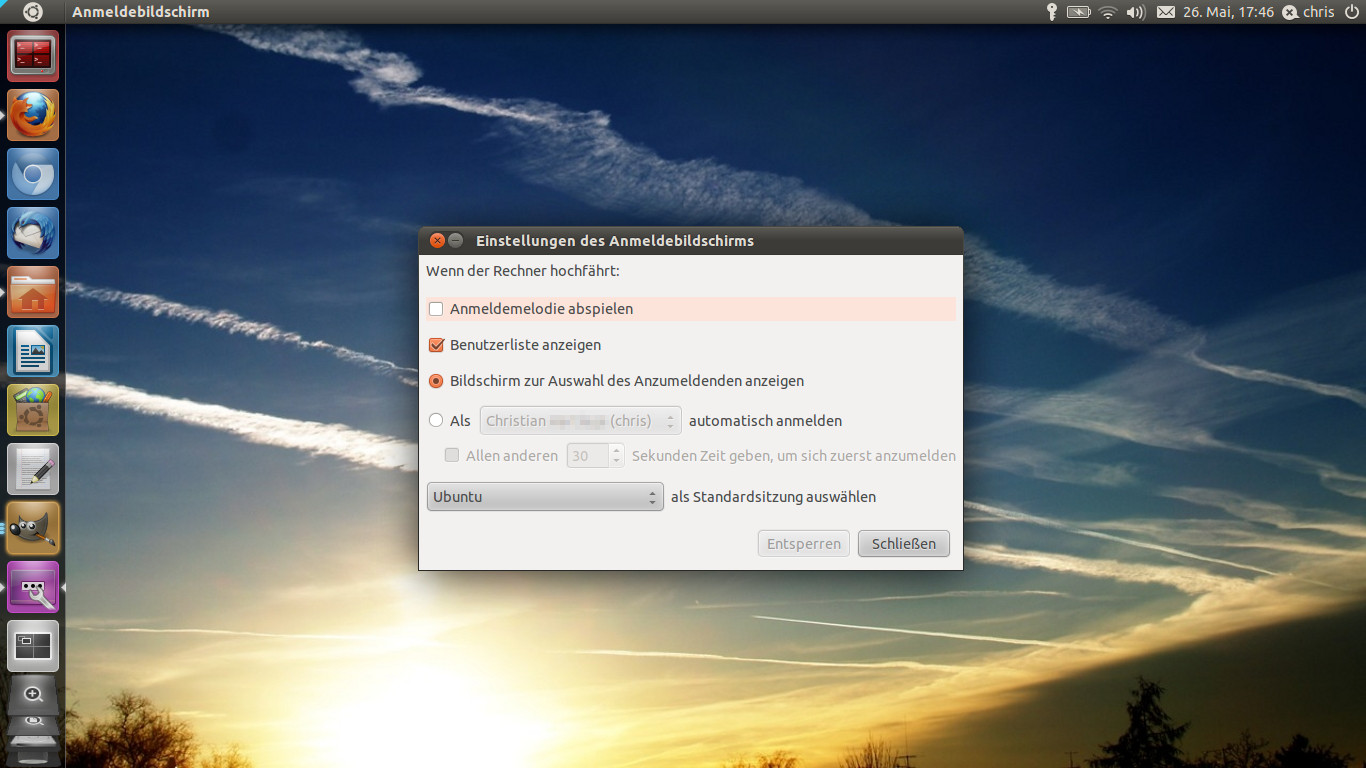 |
|
| gdmsetup in german Unity | options for gdmsetup in german |
 |
 |
| gnome-session-properties in Unity | Remove this check mark |
In the gnome-session-properties search for "GNOME Login Sound" and remove the check mark
When you log in the next time, no login sound will be played :)
Here you can compare the Windows 7 login sound to the Ubuntu one
What do you think, which one sounds better?
And if you have a custom login sound for Windows or Ubuntu, leave a comment and let us know!
Donnerstag, 19. Mai 2011
4 different wallpapers in Ubuntu 11.04 with Compiz
You want to have a different wallpaper on each workspace? Take a look at my screencast
The commands i used:
Then start the gconf-editor and remove the check mark at apps>nautilus>preferences>show_desktop .
Your 4 workspace should now have different wallpapers.
If Unity displays the menubar or the dock incorrectly just log out and then log in again.
The commands i used:
sagi compizconfig-settings-manager // installs the compiz settings manager

ccsm // starts the settings manager
gconf-editor // starts the gnome configuration tool
Then start the gconf-editor and remove the check mark at apps>nautilus>preferences>show_desktop .
Your 4 workspace should now have different wallpapers.
If Unity displays the menubar or the dock incorrectly just log out and then log in again.
Montag, 16. Mai 2011
how to replace the sudo apt-get install command with sagi
Installing applications with terminal commads is pretty easy and often faster than opening up the software center and searching the application in there.
If you want to replace sudo apt-get install with a shorter command like "sagi" you have got to download this script . Now open up a terminal and move the script to your home folder and make it invisible using this command.
 Open the file ~/.bashrc with this command:
Add this line to the end of the file:
Restart the terminal and you are good to go! You can now use sagi instead of sudo apt-get install, with tab-completion for package names!
Source
sudo apt-get install $PACKETNAMEIf you want to replace sudo apt-get install with a shorter command like "sagi" you have got to download this script . Now open up a terminal and move the script to your home folder and make it invisible using this command.
mv ~/downloads/pastie-1907126.sh ~/.sagi Open the file ~/.bashrc with this command:
gedit ~/.bashrcAdd this line to the end of the file:
source ~/.sagiRestart the terminal and you are good to go! You can now use sagi instead of sudo apt-get install, with tab-completion for package names!
Source
Donnerstag, 5. Mai 2011
Ubuntu Natty Narwhal install - now with Youtube and HTML5 !
When you install a new OS like Windows, you will spend a lot of time just looking at the slowly moving progress bar. But not in Ubuntu!
I'm installing Ubuntu 11.04 right now on my Acer ASPIRE 5742G. But even the Ubuntu installation takes some time, so I opened up Firefox and visited my Homepage.
And I was pretty surprised when I was perfectly able to watch the Family Guy Dubstep Video i uploaded a week ago. The Adobe Flash player was not even installed. Seems like Ubuntu 11.04 and the shipped Firefox 4 browser support HTML5 videos Out Of The Box.
Good job Canoncial and the Ubuntu Community! And thank you Youtube for enabling HTML5 embedded Videos!
 |
| Watch Youtube while installing Ubuntu Natty Narwhal! |
And I was pretty surprised when I was perfectly able to watch the Family Guy Dubstep Video i uploaded a week ago. The Adobe Flash player was not even installed. Seems like Ubuntu 11.04 and the shipped Firefox 4 browser support HTML5 videos Out Of The Box.
Good job Canoncial and the Ubuntu Community! And thank you Youtube for enabling HTML5 embedded Videos!
Sonntag, 3. April 2011
Ubuntu Maverick vs. Natty vs. Mint vs. Elementary
I'll examine the differences between the different versions in an upcoming post.
 | |
| Ubuntu 10.10 (Maverick Meerkat) |
 |
| Ubuntu 11.04 (Natty Narwhal) |
 |
| Linux Mint |
 |
| Elementary OS |
Freitag, 1. April 2011
How to play Minecraft on Linux Ubuntu
Minecraft is one of those games, which run on Ubuntu natively. Of course you will have to have Java set up correctly. I'll show you how to do that in a short video!
Disregard the sloppy gameplay in the video, without screencasting, everything will run smooth.
You need to install Sun Java 6
The most important command i used is
because even if the the sun-java6-jdk/jre is installed correctly, another jre/jdk like openjdk may be the preferred version of java, preventing Minecraft from starting.
The command will set SUNs JRE as the default one and evade problems.
Disregard the sloppy gameplay in the video, without screencasting, everything will run smooth.
You need to install Sun Java 6
sudo apt-get install sun-java6-jdkThe most important command i used is
sudo update-java-alternatives -s java-6-sun because even if the the sun-java6-jdk/jre is installed correctly, another jre/jdk like openjdk may be the preferred version of java, preventing Minecraft from starting.
The command will set SUNs JRE as the default one and evade problems.
Mittwoch, 30. März 2011
Crysis 2 Screenshots
Well, i have to admit, I did not take these Screenshots on Ubuntu. But gaming is the only reason why I still have Windows 7 installed on my Desktop PC. And because of the fact that i just bought the game I felt like sharing a few pics with you.
My PC's Specs are:
I love the graffiti pieces in Crysis 2!
My PC's Specs are:
- Intel Core 2 Dou E8400 3.00GHz OC@3.73GHz
- nVidia 250GTS 1GBVRAM
- 4GB PC2-6400-DDR2-RAM
- on a MSI P43 Neo-F Motherboard
I love the graffiti pieces in Crysis 2!
Gaming on Linux?
The first question I hear when talking about Ubuntu is:
And the clear answer is yes and no. Yes because of the fact, that there are some games which run on Linux natively, but I have to admit that these are few.
(Maybe the "project bossanova" will change things)
Flash games work on Linux, as long as Flash works ;)
The interesting part about gaming on Linux is:
You will be able to play Windows games!
There is a tool called wine, which allows you to run (most) Windows applications on LInux. I'll show you how to configure it to be able to play certain games some time soon, because not being able to play your favourite game, is what keeps most Windows users sticking to Windows.
In order to demonstrate, how easy playing Windows games on Linux can be, I made a short video in which i run Warcraft III in Linux Ubuntu.
But keep in mind, that most modern games won't run on Linux just like that!
Will I be able to play my games on Linux?
And the clear answer is yes and no. Yes because of the fact, that there are some games which run on Linux natively, but I have to admit that these are few.
 |
| You will be able to play Bejeweled on Linux! |
Flash games work on Linux, as long as Flash works ;)
The interesting part about gaming on Linux is:
You will be able to play Windows games!
There is a tool called wine, which allows you to run (most) Windows applications on LInux. I'll show you how to configure it to be able to play certain games some time soon, because not being able to play your favourite game, is what keeps most Windows users sticking to Windows.
In order to demonstrate, how easy playing Windows games on Linux can be, I made a short video in which i run Warcraft III in Linux Ubuntu.
But keep in mind, that most modern games won't run on Linux just like that!
Montag, 28. März 2011
A fast and easy way to install Firefox 4 in Ubuntu

sudo add-apt-repository ppa:mozillateam/firefox-stable && sudo apt-get update && sudo apt-get upgradeand hit Enter! That's it, your firefox will now be upgraded to version 4.
Explanation of the commands:
sudo = super user do: tells Ubuntu to run the following command with root privileges.add-apt-repository ppa:mozillateam/firefox-stable = add the mozillateams stable firefox PPA to your sources.list&& = Tells the Ubuntu to execute another command if the foregoing command was executed successfullyapt-get update = tells Ubuntu to update your sources.listapt-get upgrade = tells Ubuntu to upgrade all installed applicationsSonntag, 27. März 2011
How to set up a squid proxy in Ubuntu

In order to turn your Ubuntu PC into a proxy server, you have got to install squid at first:
sudo apt-get install squid/etc/squid/squid.conf
sudo gedit /etc/squid/squid.conf In order to change the name of your proxy insert the line
 visible_hostname *yourname* at the top.My school blocks all ports but port 80 so I have to change squids port to 80.
You can do that by locating the line containing
http_port 3128 (line 1114 in Ubuntu 10.10 with squid 2.7.STABLE9) and change it to http_port 80To allow other computers to access your squid server, you will have to find the line containing
http_access allow localhost and change it to http_access allow all (line 677)Now tell squid to apply the changes with
sudo squid -k reconfigure |
| port forwarding with my router |
If your IP-adress is dynamic you will have to set up dyndns (or a similair service) to guarantee your proxy server is always accessible.
I'll show you how to do that in an upcoming post!
Freitag, 25. März 2011
How to add a custom Icon to your blog
Not exactly a tip for Ubuntu users only, but this one might be useful for you!
I think the standard blogger / blogspot favicon
 is quiet ugly.
Even if you don't think it's ugly, you have to agree to the fact that one icon can not fit hundreds of thousands of different blogs. All with different themes and designs etc.
In order to change your favicon you will have to upload it to some imagehost and link it in your html code, because blogger does not give you any webspace or the ability to easily integrate your own icon. The problem is: most imagehosts don't accept the *.ico format.
Even if you found an imagehost that accepts icons you would encounter another problem. The image can easily be deleted by the hoster due to high traffic or whatever.
So here's my bulletproof way to embed your own favicon into your blog:
1. Create or download an icon you like. (You can use The Gimp to save any image as an icon)

1.Upload it to this base 64 encoder.
2.Copy the base64 encoded output.
3.Paste it into this little code snippet:
4.Go to Blogger Dashboard > Design > Edit HTML Find this piece of code
5.paste the whole snippet right in front of it.
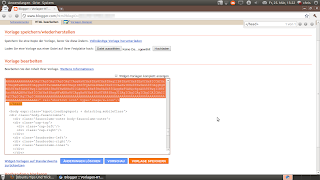
6.That's it, enjoy your new custom favicon!
Even if you don't think it's ugly, you have to agree to the fact that one icon can not fit hundreds of thousands of different blogs. All with different themes and designs etc.
In order to change your favicon you will have to upload it to some imagehost and link it in your html code, because blogger does not give you any webspace or the ability to easily integrate your own icon. The problem is: most imagehosts don't accept the *.ico format.
Even if you found an imagehost that accepts icons you would encounter another problem. The image can easily be deleted by the hoster due to high traffic or whatever.
So here's my bulletproof way to embed your own favicon into your blog:
1. Create or download an icon you like. (You can use The Gimp to save any image as an icon)

1.Upload it to this base 64 encoder.
2.Copy the base64 encoded output.
3.Paste it into this little code snippet:
<link href='data:image/x-icon;base64,[YOUR BASE64 ENCODED STRING]' rel='shortcut icon' type='image/x-icon' />
4.Go to Blogger Dashboard > Design > Edit HTML Find this piece of code
</head>5.paste the whole snippet right in front of it.

6.That's it, enjoy your new custom favicon!
Donnerstag, 24. März 2011
Wiimote in Ubuntu [Video]
Because i seem to be getting more anglophone than german visitors, i decided to write my following tutorials in english and in german. But for now, enjoy this little video about how to connect your Wiimote to your Ubuntu PC using wmgui.
I'll show you how to do some cool stuff with your Wiimote in the upcoming posts.
I'll show you how to do some cool stuff with your Wiimote in the upcoming posts.
Abonnieren
Posts (Atom)
